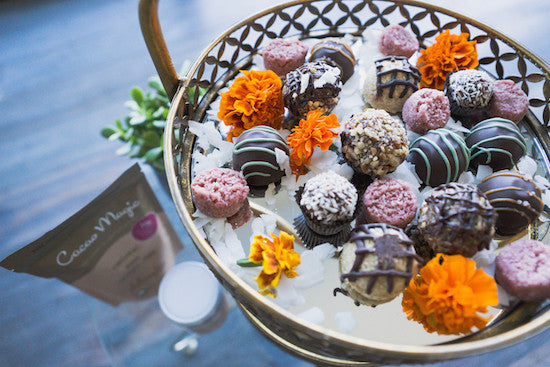
Beautiful Last Second Holiday Gifts + Superfood Mint Chocolate Candy Recipe
 It's December 24th, and you still haven't found the perfect gift! But before you scramble to find something at the mall or settle with a gift card, get a little creative + wrap up something truly meaningful—the gift of an EXPERIENCE together.
Customize your gift to match your love's interests and find something that the two of you would enjoy doing together. And the best part is that you don't even need to buy anything today—you could create a lovely card or a homemade "coupon voucher" that lists out where you'll be going or what you'll be doing with him or her!


For the Minty Center
Gather This:
- 3 cups coconut flakes, unsweetened
- 3 tablespoons raw agave nectar or maple syrup
- 1/4 cup raw Coconut Magic Coconut Butter
- 1 tablespoon raw cold pressed coconut oil
- 1/2 ripe avocado
- 2 tablespoons water
- 3 teaspoons mint extract
Do This:
- Mix the above ingredients in your high-speed blender until nice and creamy.
- Taste test to see if the sweetness and mintiness is strong enough for you.
- Place mixture in a bowl.
- Using a small scooper (about 1 1/2 tsp), make small round balls and place a cookie sheet lined with parchment paper.
- Chill while you make the chocolate.
For the Chocolate Exterior
Gather This:
-
1 cup raw cacao butter
-
1/3 cup sweetener (agave, yacon, maple syrup)
-
1 teaspoon soy lecithin (helps with smoothness, optional)
-
seeds from one vanilla bean or 1 teaspoon vanilla liquid
Do This:
Ensure all utensils and the bowl are dry before the ingredients are added as water can cause the mix to separate.
- Melt the cacao butter. There are several ways of doing this. You can make small shavings with a vegetable peeler and place a bowl of shavings in the dehydrator at 115F, you can use a double boiler at a low temperature, or you can set the bowl of cacao butter in a bowl of hot water.
- Place all ingredients in your high-speed blender and blend until smooth.
- Pour into molds that you are using immediately. The chocolate will firm up fairly quickly as the cacao butter returns to room temperature.
- If you have any left-overs, it’s best to store in the fridge for freshness.
To Finish Your Chocolates
Do This:
It is best to have everything ready before you begin dipping. Place your bowl of chocolate at your clean workstation and set out your dipping tools or dinner forks. Cover a baking sheet with a clean piece of parchment paper for placing the finished candies. Keep your truffles or soft fillings in the refrigerator until right before you are ready to use them.
Slide the edge of your fork or dipping tool under the truffle or candy center, and lift it up gently. Drop the truffle into the melted chocolate and push it just under the surface of the chocolate. Lift it out of the chocolate with the fork, and tap the fork several times against the side of the bowl. Slide the bottom of the fork over the lip of the bowl to remove excess chocolate from the bottom of the candy. Place the fork over the prepared baking sheet, and tilt the fork so the edge of the truffle touches the sheet. Smoothly slide the fork out from under the truffle. If you are adding decorations or garnishes to your candies, do it now, when the chocolate is still wet. Repeat the process with the remaining centers and chocolate.
Trimming + Storage
Once the chocolate has set, you might notice a small pool of chocolate forming “feet” at the bottom of your truffles. If desired, you can trim them with a small sharp paring knife. Wear gloves to avoid getting fingerprints on your candies, and place them on a flat surface. Grip the candy in one hand, and use the paring knife to press down on the excess chocolate and cut it off in short clean strokes. Trimming the candies is purely an aesthetic decision, and you can certainly skip this step if desired. Store the candies in an airtight container in the refrigerator for up to 2 weeks.

What beautiful gifts of experience have you given or received? Share them with us on Facebook with #myphilosophie!
